newstylegfx
Soldat

Data inscrierii: 20/Iul/2007
Mesaje: 33
|
|
 [Tutorial in engleza]Liquid Emergence |
 |
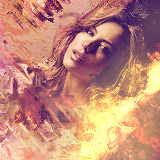
This tutorial will show you how to lucrate the illusion of a face emerging from liquid. It will also teach you a cool method for shaping a selection using the liquify filter. You should have a basic understanding of how to work with layers for this tutorial.

Download this image of Angelina Jolie
 |
 |
http://www.tipclique.com/wp-content/themes/tipclique/images/tutorial_0000009/emergence_start.jpg |
and open it in Photoshop. Select (layer > new > layer from background) from the menu, and click OK. Next select (layer > new > layer) from the menu and click OK. Drag the new layer below the layer of Angelina in the layers palette.
Set your foreground color to 20% gray and the background color to black. Select (filter > render > clouds) from the menu. Next select (filter > blur > gaussian blur) from the menu, and set the radius to 10, click OK. Next select (filter > sketch > chrome) from the menu, and set both the detail, and smoothness to the max of 10, and click OK. Next select (filter > distort > zigzag) from the menu, and set the amount to 100, the ridges to 6, and the style to pond ripples, and click OK. Next select (filter > distort > zigzag) from the menu again, and set the style to out from center, and click OK.

Select (layer > new adjustment layer > hue/saturation) from the menu, check the colorize box, set the hue to 215, and the saturation to 100, then click OK.

Next select (layer > new adjustment layer > levels) from the menu, and set the input values to 60, 1.00, and 130, and click OK.

Select the layer with Angelina Jolie. Drag the elliptical selection tool around the inside of the face.

Hit q on the keyboard to enter quick mask mode, then select (filter > liquify) from the menu, hold down the alt key so the cancel button switches to a reset button, and click it. Next check the show backdrop check box. The defaults should be set as indicated in the image below.

Now just drag the brush so the white portion lines up with inside the edges of the face, and click OK when finished. Now exit quick mask mode by pressing q on the keyboard again.

Press ctrl + j on the keyboard to create a new layer from the selection, then ctrl + click the thumbnail in the layers palette to create a selection, and choose (select > modify > contract) from the menu, and enter 5 as the value, then click OK. Press ctrl + j on the keyboard again to realizate another layer from this selection, then select the layer below it and select (filter > blur > gaussian blur) from the menu, and set the radius to 5, click OK. Next change the opacity to 50%. Now select the layer with the full image of Angelina Jolie just below the currently selected layer and set the blending mode to multiply, and the opacity to 50%.

Duplicate this layer via (layer > duplicate layer) from the menu, and change the blending mode to soft light.

Ctrl + click the thumbnail for the second layer from the top, select the top layer, and then select (layer > new adjustment layer > hue/saturation) from the menu, and click the colorize checkbox, set the hue to 215, and the saturation to 60.
Now select the very bottom layer, and select (filter > liquify) from the menu. in the show backdrop section set the layer for the use field to the very the top image layer which is just the face of Angelina Jolie, set the mode to in front, and the opacity to 100%. Now use the brush to drag the liquid material outward from inside the face so you get a ridge just outside of the face, once you have it the way you like click ok.

This step is only meant to make the liquid appear a bit more like water so if you like the way it looks now just skip this step. Duplicate the bottom layer by selecting it in the layers palette, and then selecting (layer > duplicate layer) from the menu. Rotate the duplicate layer with (edit > transform > rotate 180) from the menu, and then set the blending mode to exclusion, and the opacity to 70%.

Now just crop the image to the size you want. I have cropped this image to 520×520 so the original image bounds don’t exceed the final image.
Congratulations you’re all done.
Enjoy 
from my forum
_________________
 |
|